Overview
The Enhanced Email Automation feature in CMPOnline streamlines the process of sending emails directly from the system using data merged from the Case File. Users can configure email templates that dynamically pull case-specific information, log the communication to imaging, and create activity notes — all within a few clicks. This guide explains how to configure and use the Enhanced Email Automation feature to improve communication efficiency and documentation consistency.
NOTE: This feature is disabled by default. Please contact CMP support for details on setup and access to this add-on feature.
Enhanced Email Automation Capabilities
With Enhanced Email Automation enabled, users can:
- Create reusable email templates with dynamic field merging
- Send emails directly from CMPOnline
- Automatically image sent emails to the Case File
- Log an activity note for each email sent
- Send merged documents (Word or PDF) as email attachments
- Email accounting reports such as invoices and remittances
Getting Started with Categories and Templates
First, define the email categories and configure email templates:
- Navigate to Administration > Lookups > Document > Email Categories
- Create categories as needed (e.g., Client Emails, Demand Emails, General). Categories are user-defined and fully customizable
Now create and configure the email templates:
- Navigate to Administration > Lookups > Document > Email Templates and click “Add New”
- Select a category and enter the new Template Name
- Other optional items to add:
- Imaging Description – auto-images the email to the case file
- Activity Type – logs an activity note upon sending
- Use the editor to:
- Insert dynamic CMP fields via dropdown
- Format text (font size, color, bullets, etc.)
When you’re done, save the template. You can create an unlimited number of templates.
Sending Emails from a Case File

To send an email from CMP, access the Email Dialog:
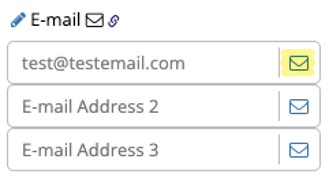
- Navigate to any record with an email address
(e.g., Case File > Debtors) - Click the email icon next to the email address field
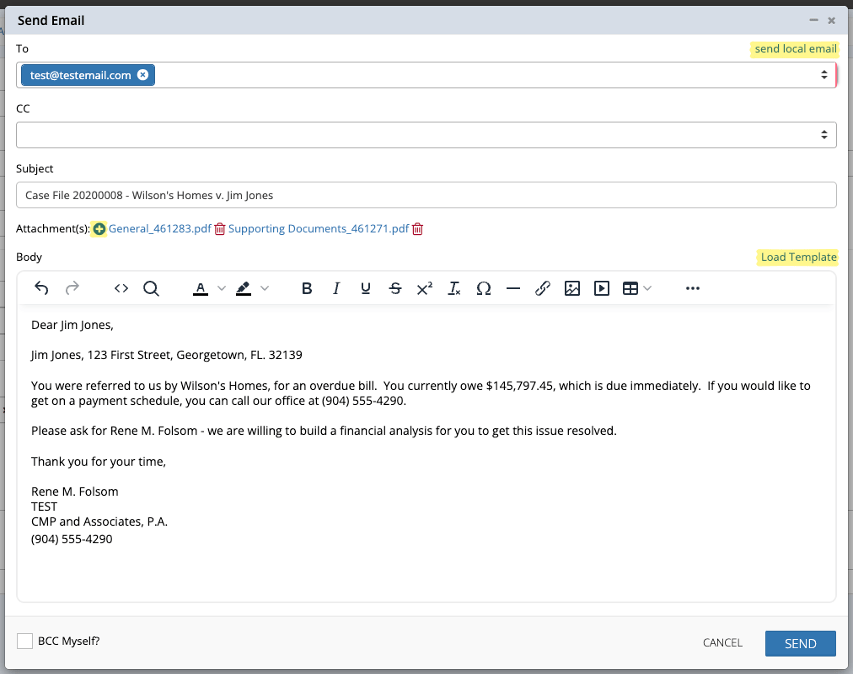
NOTE: Once the email dialog box opens, there is an option to click “Send Local Email” to open the local email client on your computer. However, if you wish to utilize merge fields and other CMP features, continue below.

- Review and update To and CC fields, Subject, etc. (subject is based on your settings configured under Administration > Setup > Company > Advanced > “Email Subject Line Template”)
- TEMPLATES: Click Load Template (optional), choose the desired template, and click LOAD to merge relevant case data into the email body
- ATTACHMENTS: Click the + symbol next to the word “Attachment(s):” to append one or more files from the imaging cabinet
- Review or Edit the email content as needed and click SEND
NOTE: If configured under the Email Templates settings, the email can be imaged to the Case File and an activity note automatically created.
Sending Merged Documents via Email
There is also the ability to email a document generated from Case File > Documents:
- Navigate to Case File > Documents
- Select and Generate a document
- In the File Menu, select either the .docx or .pdf option for the “Send via Email” function
- Follow the standard email-sending process as above
NOTE: To send to a contact on file, use the dropdown in the “To” field.

Emailing Accounting Reports
You can also send accounting-related documents using this feature, including invoices and remittances.
Example: Emailing a Bill
- Navigate to Accounting > Billing > Print Bills and follow the normal billing process
- Click the “Send via Email” icon in the upper-right corner and follow the same sending process as above


