Overview
This document details how to create and execute custom reports in CMPOnline. Custom Reporting in Case Master is extremely robust and allows us to view and export nearly every field in the system. If for any reason there’s a data field that you can’t find, just let us know, and we’ll be sure to add it.
Creating a Custom Report
- Navigate to Tools > Custom Reporting.
- Click “Add New Report”.
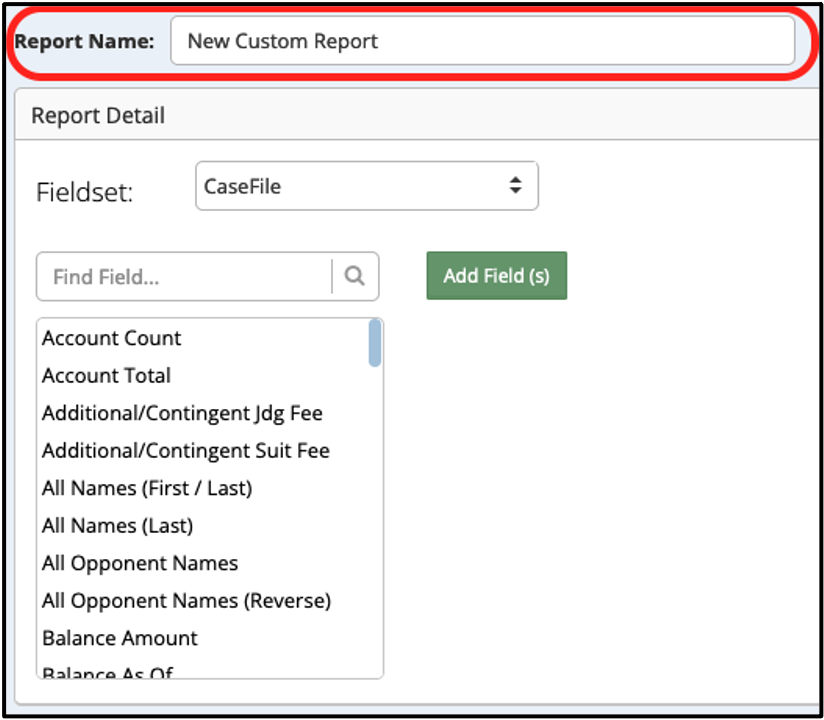
- Name the report using the Report Name field.

- Select the fieldset of the field you wish to add.
- Double click on the field you wish to add.
- Repeat this for all fields you wish to add.
NOTES:- Field columns can be organized with a simple drag and drop motion.
- Field visibility can be turned off by pressing the settings cog and unchecking the field visibility option. This is useful if you want a field/filter on your report but not visible upon execution.
- If you wish to filter on any fields, click Filter under the field you wish to filter.

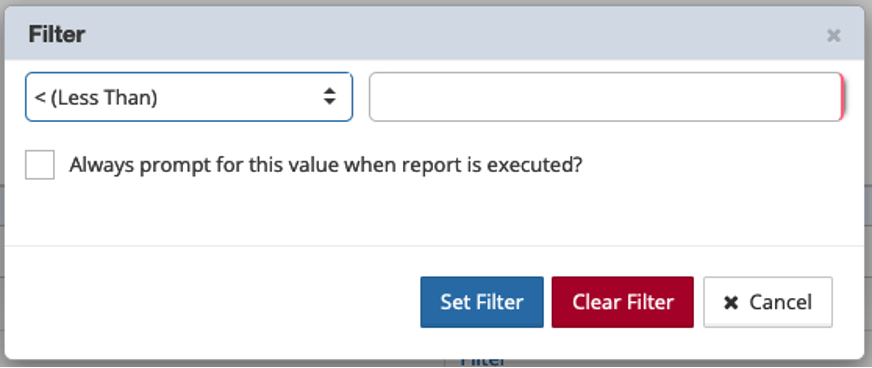
- Select how you wish to filter:
- Less Than
- Less Than or Equal To
- Equal To
- Not Equal To
- Greater Than
- Greater Than or Equal To
- Between
- Is Not Null
- Is Null
- Contains
- Does Not Contain
- Starts With
- Ends With
- In (List)
- Not In (List)
- Enter the filter value.
- Click Set Filter.

- In the top right, click Execute.
- Review the report for accuracy, then click back and make any necessary corrections.
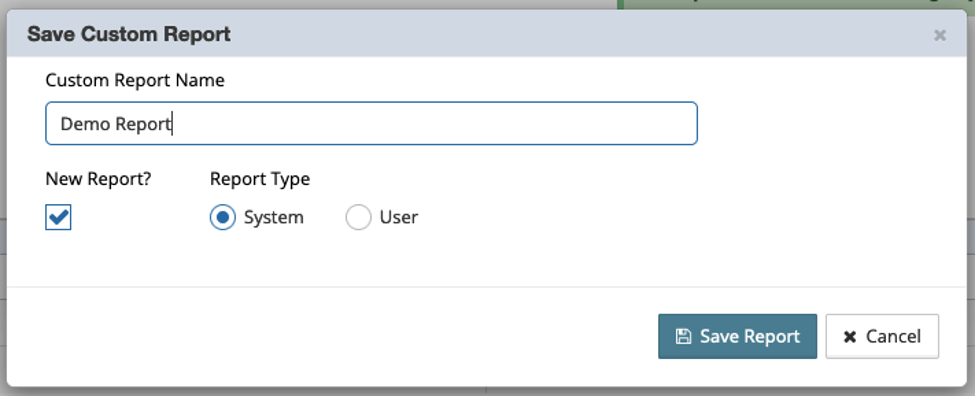
- Click Save.

- Confirm the name of the report.
- Select whether it’s a System or User Report.
- Click “Save Report”.


