This document details the procedure to configure and use legal statuses in CMPOnline.
Creating a Legal Status Code
- Start by navigating to Administration > Lookups > Case File > Activity.
- Click “Add new”
- Enter a Description
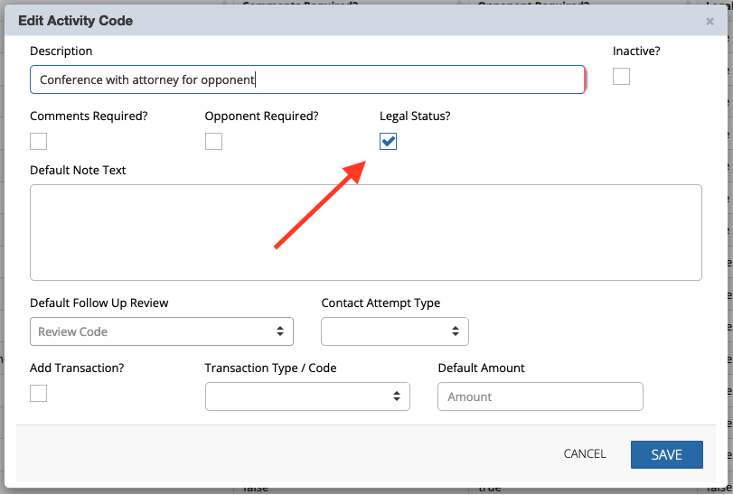
- Check the “Legal Status?” Box (Shown Below)
- Optional Fields Include:
- Default Note
- Default Follow Up Review
- Contact Attempt Type
- “Add Transaction?” box
- Transaction Type / Code
- Default Amount
- Click Save

Using a Legal Status
- Start by navigating to Case File > Activity
- Click Add New
- Choose the Activity Code set with the Legal Status property from the previous steps.
- Optional Fields:
- Comment
- Note
- Debtor
- Follow Up Review
- Existing or New Image
- Click Save
- Save the Case File
You will now be able to view the last legal status on the main case file screen. (Shown Below)

Legal Statuses in Custom Reporting
Once a legal status is used in the activity on a case file, you can also pull this data in your reports under custom reporting using the “Last Legal Status” fieldset. For more information about Custom Reporting, please see our help document.


