This document details how to configure service codes and set up hourly billing.
Configuring Service Codes and Default Rates
Before we can add hourly billing to a case file, we must first configure a service code to allow for hourly billing. To do this:
- Navigate to Administration > Lookups > Financial > Service Codes.
- We can view all current hourly service codes by searching for “Hourly” in the search bar above.
- Click “Add New” or double click to begin editing a service code.
- Now configure all required fields in addition to the following fields related to hourly billing:
- Time – Which sets a default time (in hours) for the service code to default to.
- Amount – Which sets a default amount for the service code to default to.
- Click “Save”.
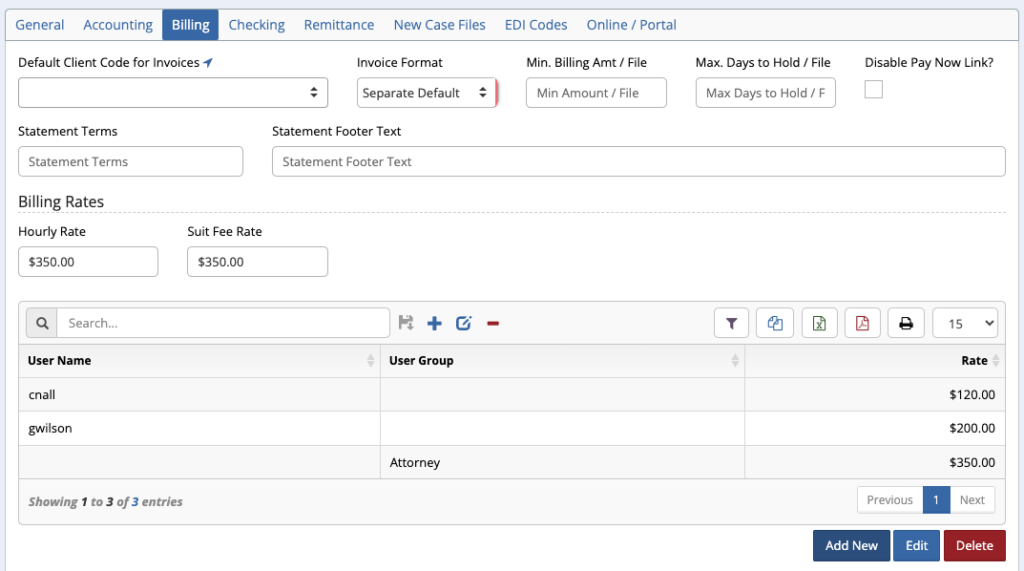
- Navigate to Contacts > Clients > Select a Client > Settings > Billing.
- To set a bill rate, per user, for the client, click “Add New”.
- Select the User or User Group you would like to set a rate for.
- Enter the rate.
- Click “Save”.

Adding Hourly Billing
Once hourly billing is configured, we can add it to a case file by completing the following steps:
- Navigate to Case File > Main > Settings.
- Ensure “Hourly Case?” is checked.
- Click on the billing timer, located at the top of the page.
- Click the “Start” icon in the billing timer section.

- While the timer runs, work the case file as needed. This timer will now run continuously, no matter which page you navigate to within Case Master Pro.
- Once completed, click the Pause button, then the Bill button.
- You will now be brought to the billing screen.
- You can either click save if all is correct or edit the Add Billing pop-up as needed by selecting a new service code or amount.


