Overview
In this document, we’ll be looking at configuring counties, clerks, and court locations in CMPOnline. These three areas are all interconnected, so we suggest reading the entire help document or watch the complete YouTube video before making changes yourself.
Counties
Editing from the Contacts Screen
- Navigate to Contacts > Counties.
- Double click a county to edit or click Add New to add a new county.
- If creating a new county, the required fields include:
- Code
- County Name
- Circuit
- Fill out or edit any additional fields as needed.
- Click Save.
Editing from the Case File
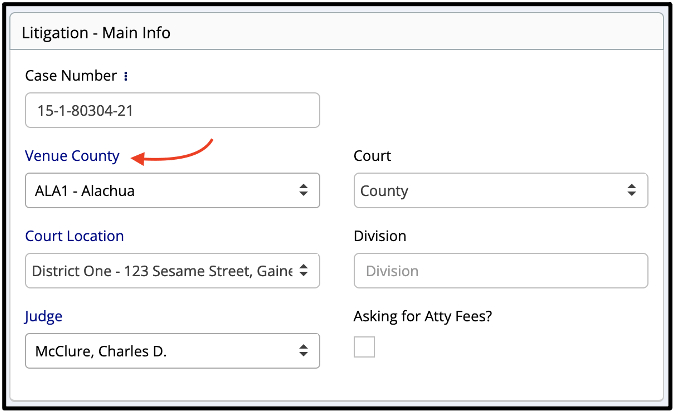
- Navigate to Case File > Litigation.
- Click the blue Venue County label in the Main Info section.
- Make any necessary changes and save.

Clerk of the Court
- Navigate to Contacts > Clerks.
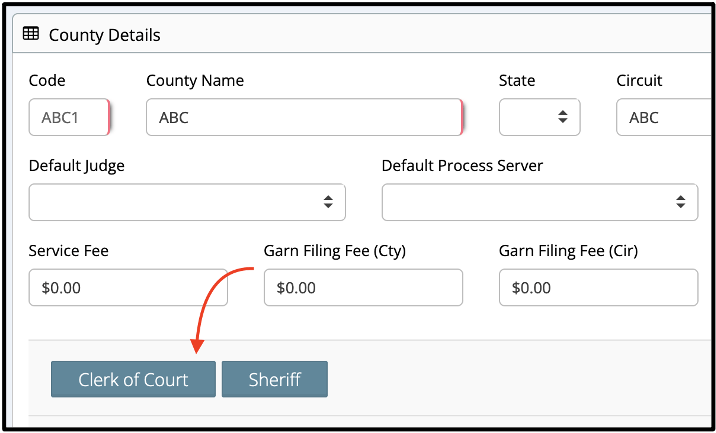
- If you are already on the corresponding counties settings page, you can click the Clerk of the Court button as seen below.

- There are no required fields on this screen besides the clerk code, but it is recommended to populate as many fields as possible for the most accurate record keeping.
- Save once done.
Court Locations
- Using the instructions above, navigate to the clerk of the court for the county you would like to add a court location for.
- Scroll to the bottom of the page and locate the Court Locations grid.
- Click Add New, populate the court location pop-up and save.
- You are now able to select this location on the Case File > Litigation tab.


