Overview
This document details the various case file screens offered in CMPOnline. The screens shown are all customizable and some may be hidden based on security settings, though this document details all default screens and how they come configured.
Main
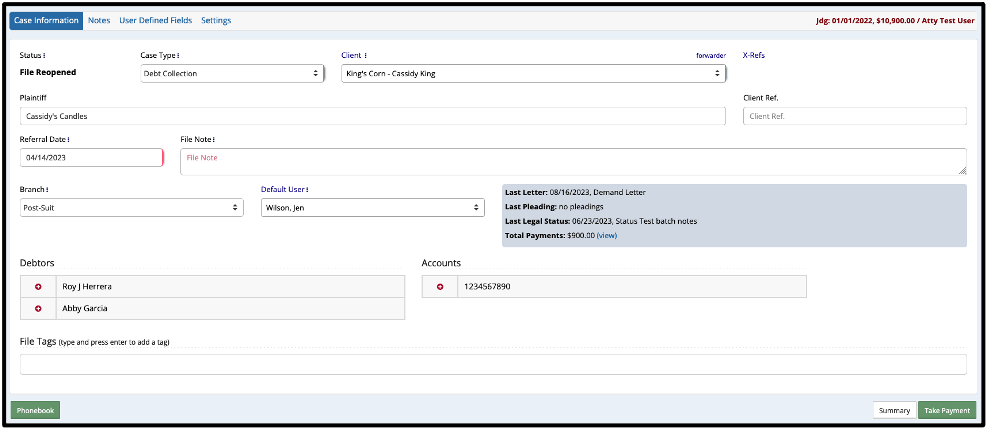
The main case file screen is where all basic information is held. This includes Case Type, Client, Plaintiff, and more. You can also view an overview of the debtors and accounts for a file on this screen by expanding the tabs located at the bottom of the page.
Using the tabs at the top of this screen, you may also see an overview of case file notes, and custom User Defined Fields your firm may have set, and settings specific to this case file.

Accounts
The accounts screen is where you will record information specific to the account. You may add multiple accounts if needed to a single case file, which will all be available to select at the top of the screen. All fields on this screen are also customizable based on the Account Type selected. You may navigate to the Administration > Lookups > Account > Account Types screen to configure these if needed.
Opponents (Debtors)
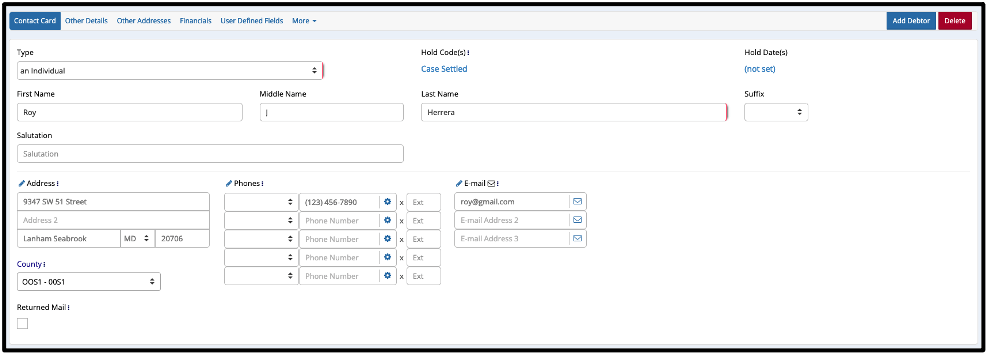
The opponents screen is where you will add opponent information. This screen may also be labeled as Debtors if a debt collection case type is selected. Similar to the accounts screen, you may add multiple opponents if needed, though all opponent screens will hold information such as their contact information, financial information, and more. Please view our Additional Debtors Screen video for more information.

Litigation
The litigation screen holds information such as suit, judgment, and stipulation fields. This screen may not be able to be populated when opening a case file, though this screen is necessary as the file progresses. Also on this screen, you can navigate to Recording Counties and Motion to Tax fields by using the tabs at the top of the screen.
Activity
The activity screen is where you will find all actions made on a file. The actions, or activities, shown in the grid are customizable based on which checkboxes are selected at the top of the screen. You may also add new notes on this screen by clicking Add New at the bottom of the grid. View our Adding Activity Codes video for more information.
Documents
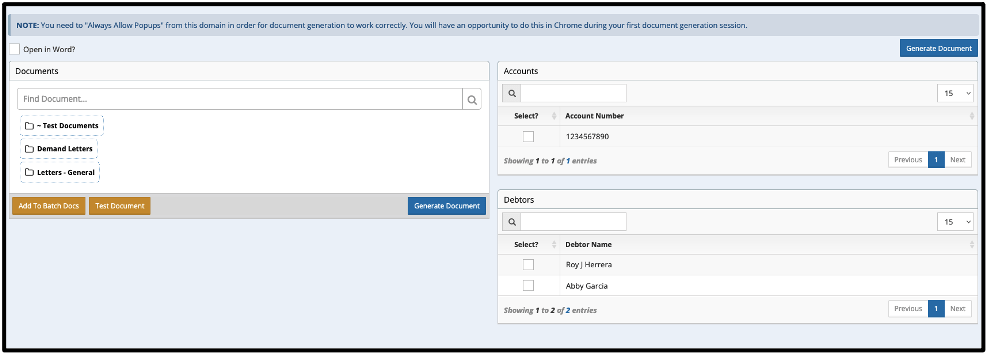
The documents screen is where you can generate any documents needed for a file. This screen works by selecting the document you wish to generate, selecting the account and debtor you wish to generate the document for, and clicking Generate. Please view our Document Generation Basics for more information.

Imaging
The imaging screen is where all images related to the case file are located. You can save a variety of files on this screen, including .PDF, .docx, .xlsx, .PNG, .JPEG, .MP3, and more. When documents and reports in CMPOnline are imaged, this is where you may find them. Please view our Imaging for more information.
Reviews
The reviews screen can be thought of as a task list or a reminders screen. This screen allows you to set reviews for specific actions such as Call Debtor or Close File After Remit, which also shows up in each user’s Review List, allowing for a more streamlined case file management process.
Financial
The financials screens consists of 4 different screens: Balance, Billing, Checks, and Transactions. The balance screen is the most basic overview of the financial information on a file. The billing and checks screen allow you to enter billing and checks directly from the case file without needing access to the accounting area. Lastly, the transaction screen shows a breakdown of all transactions on a file in detail.
Problems
The problems screen is used most often when opening a case file. This screen allows you to check for problems that may occur in the case file, such as fields that may be missing, as well as conflict checks, such as if two debtors in the application have the same SSN.


