Entering Garnishments
- Navigate to Case File > Opponents > (Opponent).
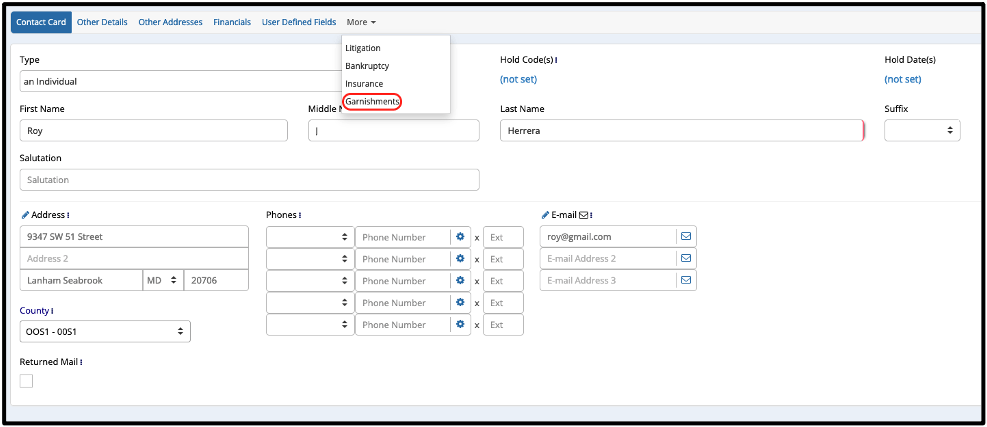
- Under the More tab at the top of the screen, select Garnishments.

Quick Tip!
If you access the garnishments screen often, you can keep the More menu open at all times by navigating to User Preferences and selecting Expand Debtor’s “More” Tab?.
- Click “Add New”.
- Choose either Wage or Bank for the garnishment type.
- Begin to populate garnishment fields.
Note: The Garnishee – either “employer” or “bank” depending on the type of garnishment – is only one required field in this pop-up. It is recommended to populate all relevant fields, which can either be done now or edited at a later date. - Review all information for accuracy and click “Save”.
Dismissing Garnishments
- Navigate to Case File > Opponents > (Opponent).
- Select the garnishment you wish to dismiss and click “Edit”.
- Select a Dismissal Reason and click “Dismiss”.
Note: You can add reasons to this list by navigating to Administration > Lookups > Opponent > Garnishment Dismissal Reasons.
Garnishment Merge Fields
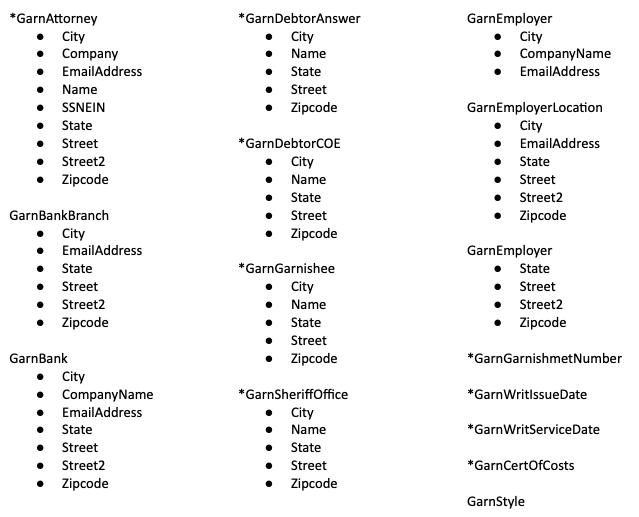
If you wish to begin incorporating garnishments into your document templates, below is a list of available merge fields able to pull garnishment related information.

*Fields available for both bank and wage garnishments.


